Underwater Photography Tips for Divers

Capture the beauty of marine life with these essential photography techniques and equipment recommendations. Transform your diving adventures into stunning visual memories.
Underwater photography opens up a whole new dimension to diving. There's something magical about capturing the vibrant colors, unique behaviors, and incredible beauty of the underwater world to share with others. Whether you're using a simple action camera or a professional setup, these tips will help you take your underwater photography to the next level.
Start with the Right Equipment
For Beginners:
- Action cameras (GoPro, DJI): Affordable, durable, and easy to use. Perfect for wide-angle shots and video
- Compact cameras in housings: Better image quality with more manual controls. Brands like Olympus TG-series are popular among divers
- Smartphone housings: Budget-friendly option for casual photography
For Advanced Photographers:
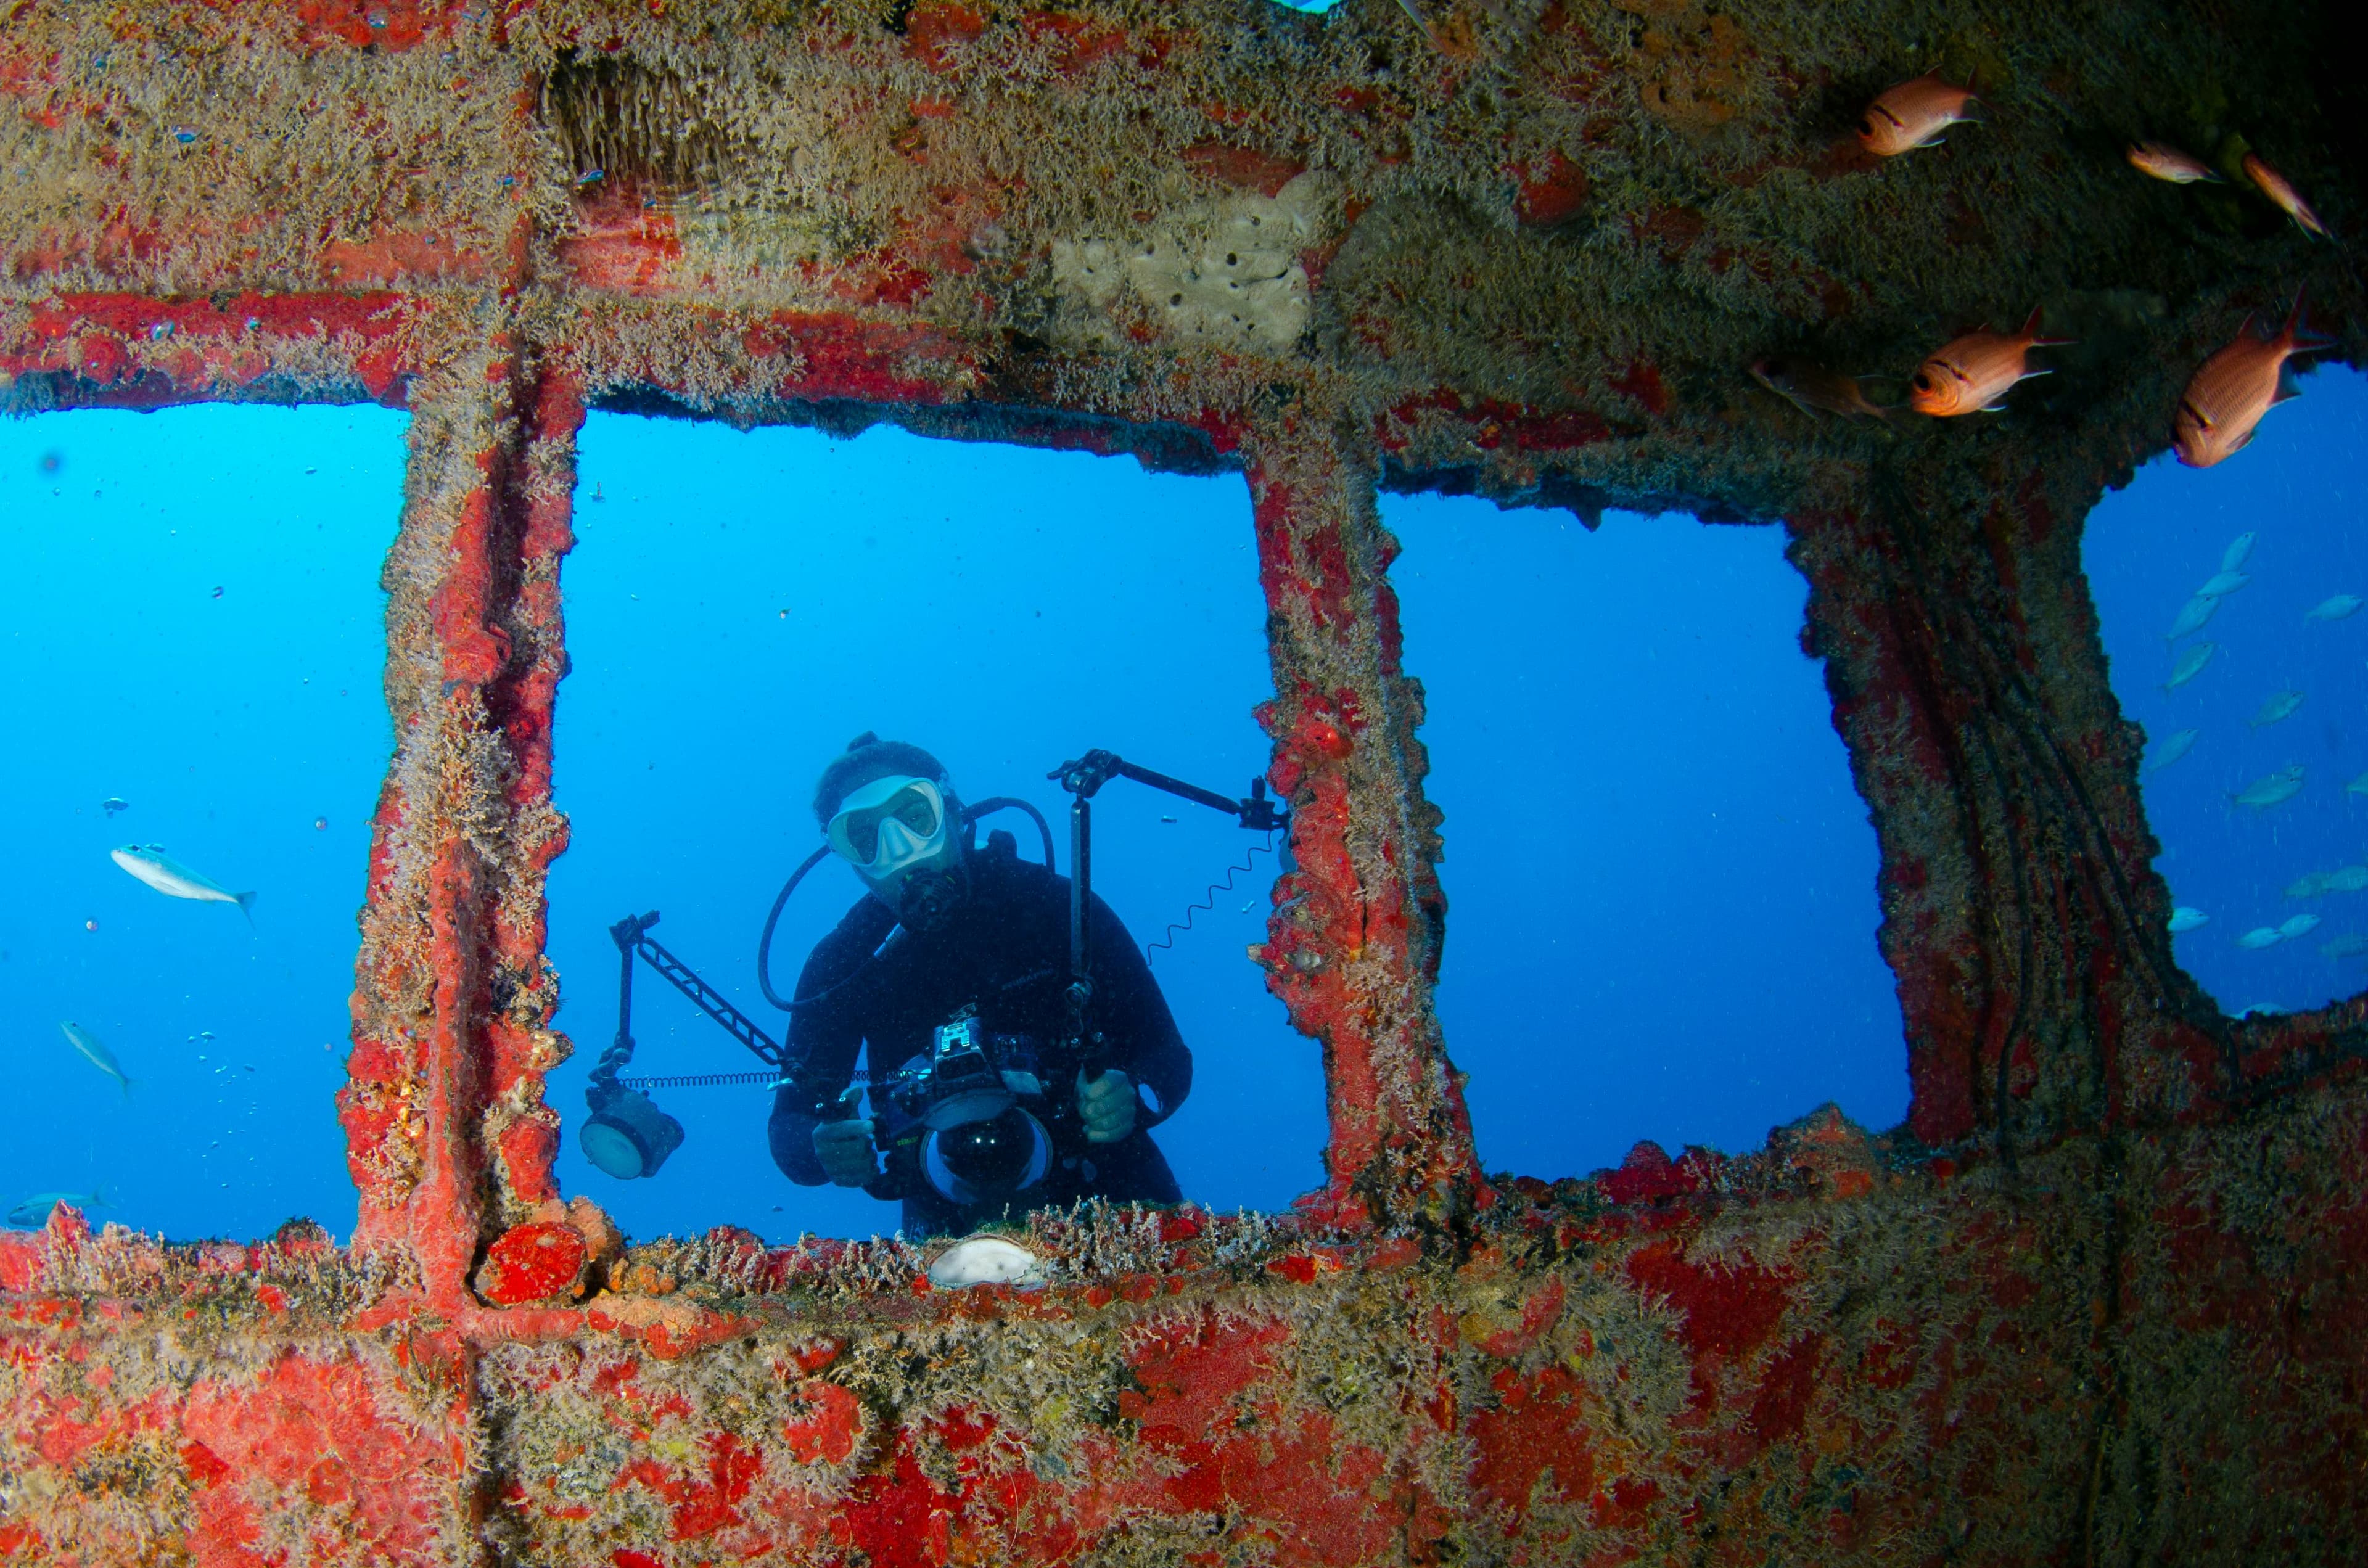
- Mirrorless/DSLR cameras: Professional image quality with full manual control
- Strobes or video lights: Essential for bringing out colors at depth
- Macro lenses: For capturing tiny critters and details
- Wide-angle lenses: For reef scenes and large marine life
Master Your Buoyancy First
The golden rule: You must be a competent diver before becoming an underwater photographer. Poor buoyancy control leads to:
- Damaged coral reefs from accidental contact
- Blurry photos from unstable shooting positions
- Stirred-up sediment ruining visibility
- Safety risks from being distracted by your camera
Practice achieving neutral buoyancy and hovering motionless before adding a camera to the mix. Your diving skills should be second nature so you can focus on photography.
Get Close—Then Get Closer
Water reduces contrast and color, so the less water between you and your subject, the better. A common beginner mistake is shooting from too far away.
Pro tip: For most subjects, aim to be within 1-2 feet (30-60cm). For macro photography, you might be just inches away!
Getting close also helps your subject fill the frame, creating more impactful images.
Understand Light and Color
Water absorbs light quickly, with red disappearing first, then orange, yellow, and so on. This is why everything looks blue-green at depth.
Solutions:
- Dive shallow when possible: The best natural light is in the first 10 meters
- Use strobes or video lights: Artificial light brings back vibrant colors
- Shoot upward: Use the surface as a bright background for silhouettes
- White balance adjustment: Use your camera's underwater white balance mode or add red filters
Composition Techniques
Rule of thirds: Imagine your frame divided into a 3x3 grid. Place your subject at the intersection points rather than dead center.
Eye contact: When photographing fish or marine animals, focus on the eyes. A sharp eye makes the whole image come alive.
Negative space: Don't always fill the frame. Sometimes empty space around your subject creates a more powerful image.
Leading lines: Use natural elements like coral formations, light rays, or the reef edge to guide the viewer's eye to your subject.
Shoot upward: Taking photos from below your subject creates dramatic images with the blue water or surface as background, separating your subject from busy reef backgrounds.
Camera Settings Tips
Shutter speed: Use at least 1/125s to freeze motion. For fast-moving fish, go to 1/250s or faster.
Aperture: F8-F11 is often ideal for reef scenes, giving good depth of field. For macro, you might need F16-F22 to get your whole subject in focus.
ISO: Keep it as low as possible (100-400) when using strobes to minimize noise. You can go higher (800-1600) for ambient light shots.
Shoot in RAW: If your camera supports it, RAW files give you much more flexibility in post-processing to adjust colors and exposure.
Working with Marine Life
Be patient: The best shots come to those who wait. Observe animal behavior and anticipate actions.
Move slowly: Quick movements scare marine life. Approach gradually and let animals get comfortable with your presence.
Never touch or harass: Don't move marine life for a better shot. Respect their natural behavior and habitat.
Know your subjects: Learn about marine life behavior. Understanding when fish are about to dart away or when octopuses change color helps you anticipate great moments.
Macro Photography Secrets
Macro photography reveals the incredible tiny world most divers swim right past.
Best subjects:
- Nudibranchs (sea slugs) in vibrant colors
- Shrimps and crabs hiding in coral
- Tiny fish like gobies and blennies
- Coral polyps and texture details
Techniques:
- Use a focus light to help your camera autofocus in low light
- Shoot at eye level with your subject
- Use a small aperture (F16-F22) for maximum depth of field
- Take multiple shots—macro subjects often move slightly
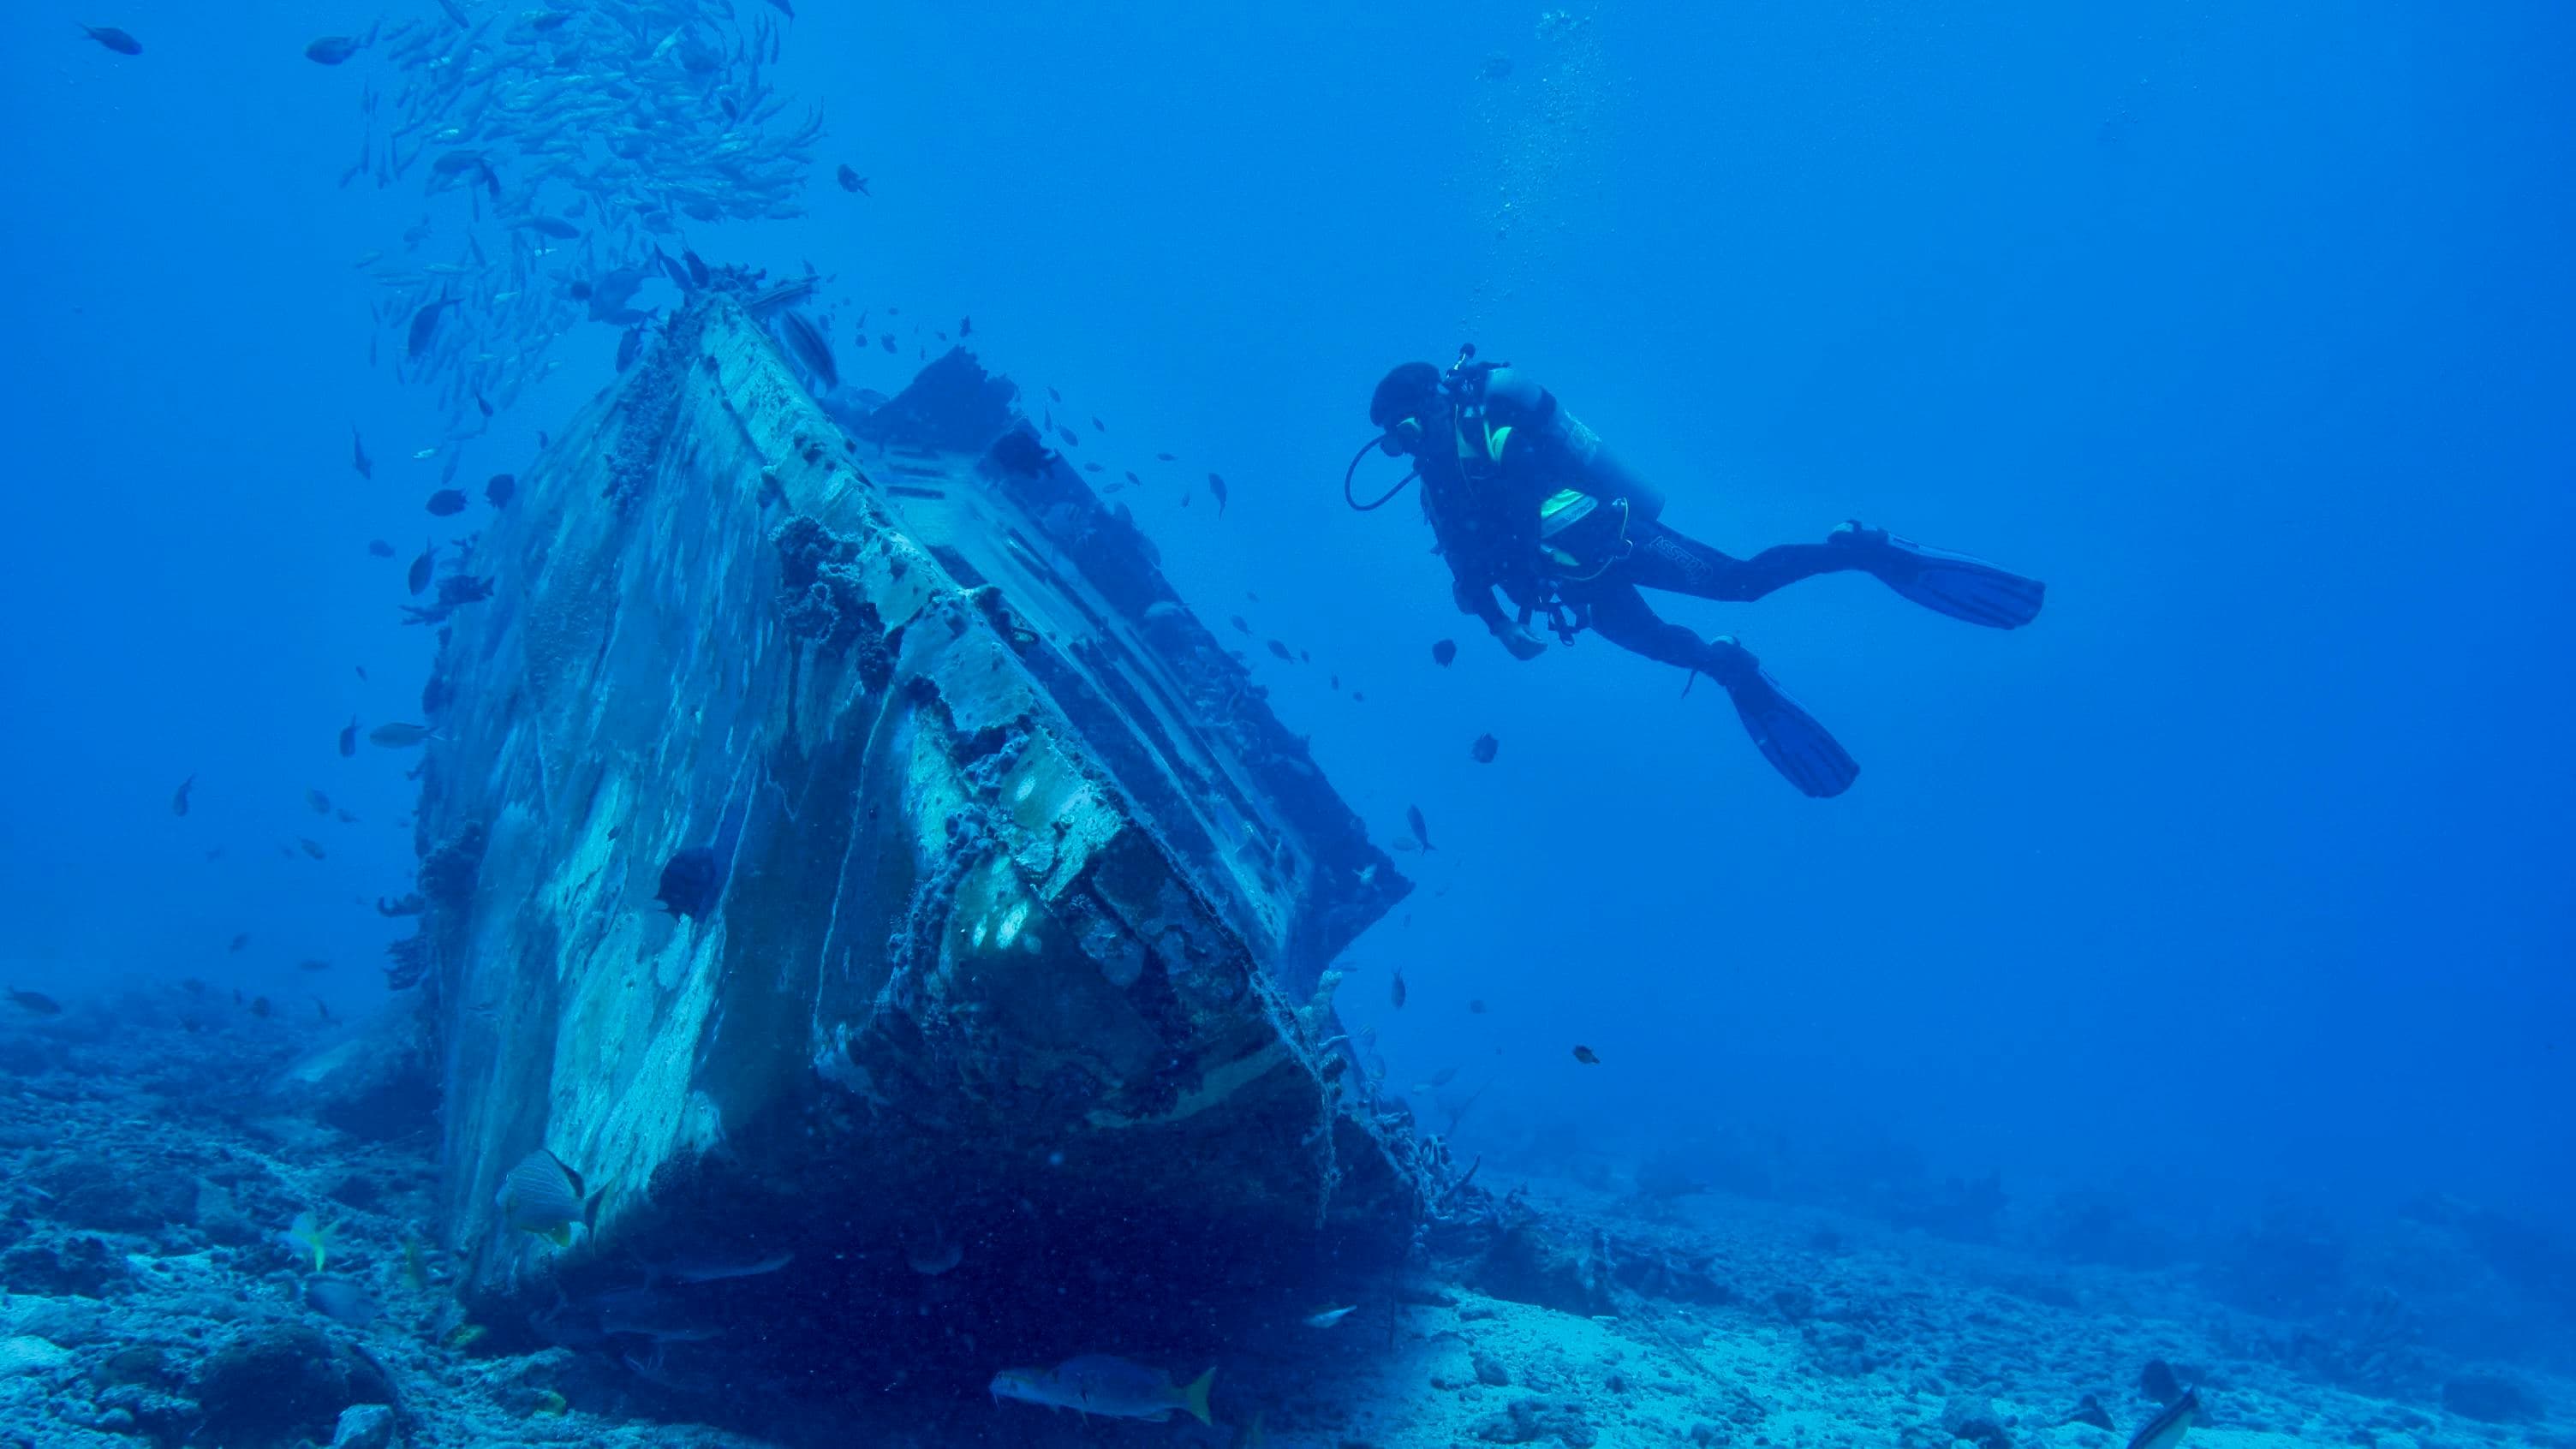
Wide-Angle Photography Tips
Wide-angle shots capture the grandeur of the reef and create that "immersive" feeling.
Techniques:
- Include a diver in the frame for scale and human interest
- Shoot upward to use the bright surface as background
- Get close to foreground subjects (coral, sponges) while showing the reef behind
- Look for natural light beams or sun balls through the surface
Common Mistakes to Avoid
- Shooting down on subjects: This creates boring, muddy backgrounds. Shoot level or upward
- Using too much strobe power: This creates harsh, blown-out highlights. Start at half power and adjust
- Taking too many shots: Focus on quality over quantity. Being selective helps you improve faster
- Forgetting to check settings: Review your first shots and adjust ISO, aperture, or strobe position as needed
- Not protecting your gear: Rinse cameras thoroughly in fresh water after each dive and check O-rings regularly
Post-Processing Basics
Even great underwater shots usually need some editing:
- Adjust white balance: Bring back reds and warm tones lost to water
- Increase contrast: Water reduces contrast, so boosting it makes images pop
- Crop for composition: Fine-tune your framing and remove distractions
- Remove backscatter: Use healing tools to clean up particles in the water
- Don't over-edit: Keep it natural—overly saturated colors look fake
Practice and Patience
Underwater photography is challenging, and that's part of the fun! Every dive is a chance to improve. Review your shots after each dive, identify what worked and what didn't, and try new techniques next time.
Remember: The best camera is the one you have with you. Don't wait for perfect gear—start shooting now and upgrade as you develop your skills and style.
Ready to Capture the Ocean's Beauty?
The underwater world is full of photographic opportunities, from tiny nudibranchs to massive whale sharks. With practice, patience, and these tips, you'll be creating stunning images that capture the magic of life beneath the waves.
Now grab your camera, get in the water, and start shooting!
Want to practice your underwater photography skills? Join us on our dive trips to some of the Philippines' most photogenic sites!
Ready to Dive In?
Join us for an unforgettable underwater adventure. Book your dive today and experience the beauty of the ocean!
Related Articles
Top 10 Dive Sites in the Philippines
Discover the most breathtaking underwater locations in the Philippine archipelago, from coral gardens to historic wrecks.
Read More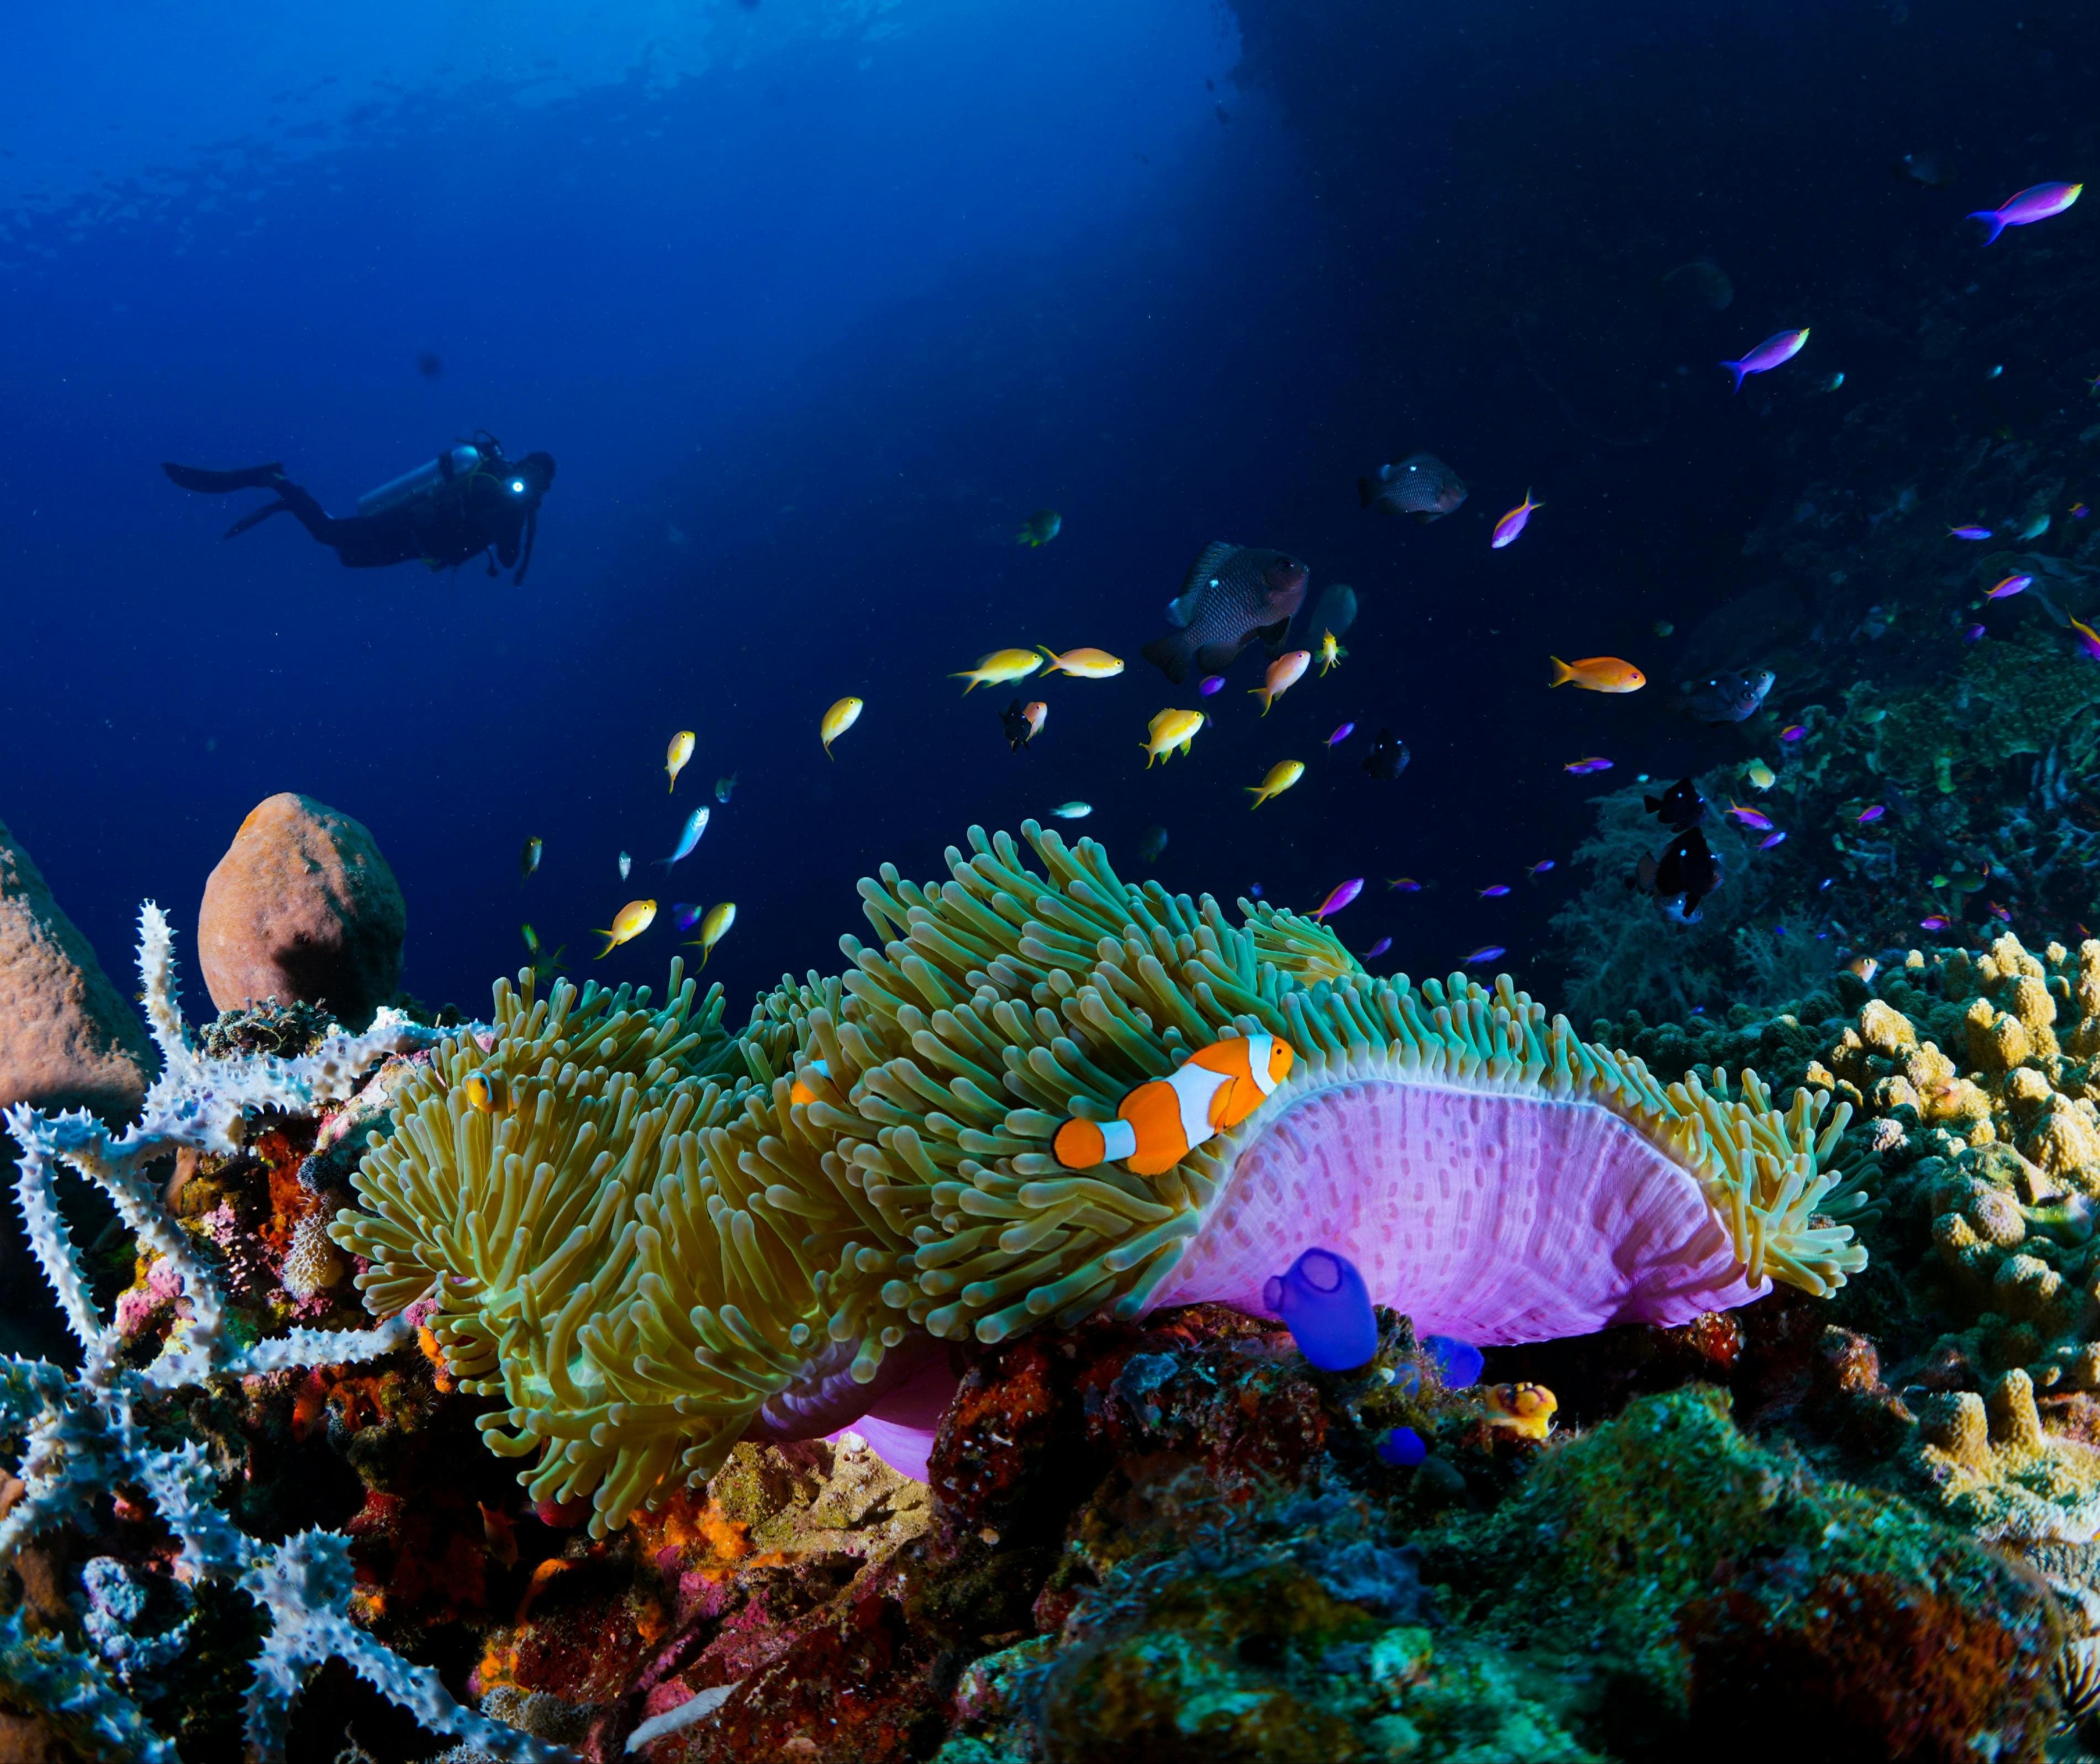
Complete Guide to Your First Dive
Everything you need to know before taking your first plunge into the underwater world. From what to expect to essential tips for a safe and amazing experience.
Read More
Protecting Our Ocean: Conservation Efforts
Learn how divers can contribute to marine conservation and protect our precious underwater ecosystems. Discover the challenges facing our oceans and what we can do to help.
Read More